|
Instructions for 5500 Package. Overview
When you open this Form 5500 page for the very first time, the Form 5330 is the only form that may be edited and/or printed. In order to work with any other form, you must first add the form to the "Edit/Print" box by clicking on the appropriate form in the "Add Schedules" box. When you click on the form in the "Add Schedules" box, the system will first check whether you have entered copies of this form for any prior year. If so, it will copy the data for all of the schedules of the same type for the most recent year. If there are not any prior year schedules, the system will add a blank new schedule. Some filings may contain more than one copy a certain schedule. To add more of these schedules you merely click on the appropriate form in the "Add Schedules" box. The description of each new multiple form will be "New". You may change the five-character description by clicking on the schedule under the "DRAFT - EDIT" heading in the Edit/Print box. After making your change, be sure to click on the red update bar in order to save your changes. See "Editing a Form 5500 Schedule" below for more information. Entering Information on a Form 5500 Schedule Return to top To enter information in a schedule, click on the schedule under the "DRAFT - EDIT" heading in the "Edit/Print" box. You may need to wait until Adobe Acrobat opens before the form will be available for printing. However, once Adobe Acrobat is running, each schedule should open reasonably quickly. The actual speed is dependent upon the speed of your Internet connection. If you are using a high-speed Internet connection, the schedule should open immediately. Once the schedule is open you may enter data as you wish. Saving Your Changes Return to top Please be sure to click on the red update bar on the right hand side of each page. It is a good practice to click this bar often to avoid inadvertent data loss. Clicking the red update bar will save changes made to the entire form. After you have saved all of your changes, you may return to the main 5500 page by clicking on the green return bar on the left hand side of each page. Clicking the green return bar will close the schedule without saving any changes since the last time the red update bar was clicked. You should click on the red update bar immediately before clicking the green return bar to ensure all changes are saved. You may print the draft version of each schedule by pressing the print icon of the Acrobat Reader toolbar directly above the form. Please note that the draft version does not contain the special 2D bar code and cannot be used for filing with DOL. See below for information regarding printing the filing copy. Consult the help materials Return to top There are two methods of consulting the official DOL instructions. 1. On the main 5500 page, you may click on the "I" link next to the appropriate schedule under the "DRAFT - EDIT" heading in the "Edit/Print" box. This will display a page with the full text of the instructions for the applicable schedule. There will be links on this page to the general 5500 instructions. 2. When you are entering data on a schedule, you may click on the blue buttons next to the line item on the form to read the materials related to that line item. Once all of your data is entered, you may perform edit checks on the data for each schedule. You may run edit checks on each schedule by clicking on the appropriate link under the "STATUS" heading in the "Edit/Print" box. The purpose of these edit checks is to look for missing and/or inconsistent data. These edit checks are NOT intended to check for the accuracy, correctness or completeness of the responses. Immediately before printing the final version of all the schedules, it is a good idea to rerun all edit checks even if the all status codes are "OK". The status of the edit checks is reflected under the "STATUS" heading in the "Edit/Print" box. The following is a description of the status codes: OK A status code of "OK" indicates that the edit checking was successfully completed and no errors were detected. ??? A status code of "???" indicates that the information entered on the schedule has changed since the last edit check. NOT-OK A status code of "NOT-OK" indicates that the edit checking detected one or more errors. Printing the filing copy (with bar code) of a Form 5500 Schedule Return to top Once you are satisfied that the filing is complete, click on the appropriate schedule under the "FINAL" heading in the "Edit/Print" box. You will note that this Acrobat PDF document cannot be edited and contains the special 2D bar code for filing with the Department of Labor. You may also print the entire filing by clicking on the "Print All FINAL Schedules" link. IMPORTANT: Before you print a schedule, you should be sure that Acrobat is set up so that the PDF document is printed at 100% of its correct size. You should do this by clicking on the printer icon on the Acrobat tool bar that is located underneath the main browser toolbar. Make sure the "Page Scaling" setting under the heading "Page Handling" is set to "None". (The default value is oftentimes set to "fit to page" which will shrink the Schedule by 94%.) For the DOL to accept the filing, the "Page Scaling" setting must be set to "None" so that there is no size reduction on printing. You can confirm the proper setting by looking in the "Preview" section and observing that the zoom is 100% (or that the document and paper size are both 8.5 x 11). After you verify that Adobe Acrobat is configured correctly to print 5500 forms and schedules, you should read the section below titled "Printing DOL Barcodes" in order to ensure that the 2-D barcodes will print correctly. After printing, you can also confirm that the form printed properly by determining that the registration marks are 1/2 inch from the side of the paper (some small discrepancies do exist if the printer is not properly calibrated).DO NOT: Print to any printer that creates a file such as "Adobe PDF", "Microsoft Office Document Image Writer" or any other electronic storage system such as "eFileCabinet". The files created using these drivers will be rejected by the DOL as they tend to shrink the bar codes. If you want to save the 5500 file, you merely need to save the PDF file that is generated by our system and sent to your browser. As the final schedule is a regular PDF document, you may save the PDF document to your local disk for safekeeping. You may also send your clients an email with the final schedules as an attachment. If your client will be printing the final schedules, you should be sure that your client is instructed on the proper printing technique described above. Once the schedule is printed (and if desired, saved on your local disk) you can click on the "Back" button on the browser to return to the main 5500 page. DOL Printing Instructions
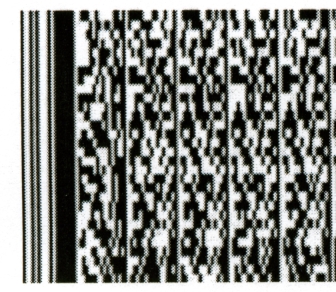
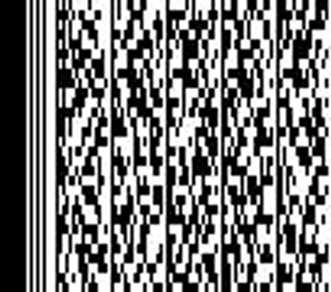
Printing DOL Barcodes Under certain circumstances, the 2-D barcodes at the bottom of the 5500 forms and schedules may not print correctly. When the barcode does not print correctly it will appear blurry with jagged edges, almost as if it has been stretched (see below). On the flip side, when the 2-D barcode does print correctly it will contain solid, crisp, vertical black lines. Within the vertical lines there will be solid black squares (see below). A blurry barcode may be most obvious on large schedules, such as page 3 of Schedule C. The most common cause of barcode problems is the misconfiguration of a printer and the associated drivers. All printers whether they are a Laser or Inkjet printer use printer Language such as PS (Postscript) or PCL (Printer Command Language). Some printers, such as the HP Laserjet 4200, will allow you to install either PS or PCL drivers for your printer. It is important that the appropriate drivers be installed. Installing the wrong drivers, such as the PS drivers for a PCL printer can cause printed documents to become distorted. In cases where you are using a print server (a computer on your network designated to handle printing), you will need to make sure your local drivers match the driver installed on the print server. Most Microsoft Windows print servers will automatically install the correct driver.
You may test your printer settings by printing this Schedule C. The barcode in this schedule C should print solid, crisp, vertical black lines and should not appear as though it has been stretched. If you have any questions about the barcode or are having difficulties determining the correct driver settings, please contact ftwilliam.com at 800.596.0714 or support@ftwilliam.com. Deleting a Form 5500 Schedule Return to topYou may permanently remove a schedule by clicking on the "Del" link next to the appropriate schedule under the "DEL" heading in the "Edit/Print" box. Once a schedule is deleted, all of the information it contains will be permanently lost.
|
| Copyright © 2007 Fort William LLC |


