Custom Edit Checks
Edit Checks Overview
The document software uses edit checks to help ensure all applicable information is entered in the checklist correctly and to help catch errors. In addition to the edit checks ftwilliam.com has embedded in the software, you can also disable the ftwilliam.com edit checks and/or create additional new edit checks. Please note that only users with administrative rights can use the custom edit checks feature.
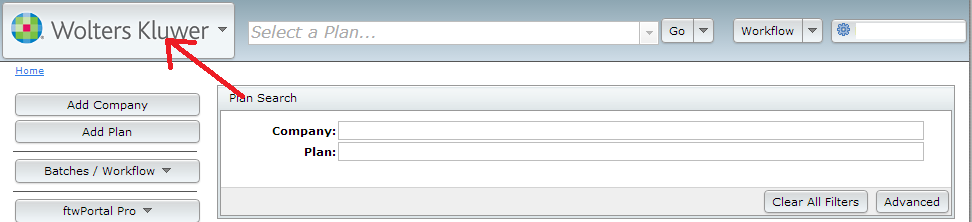
To access custom edit checks, click the Wolters Kluwer logo at the top left of the screen.
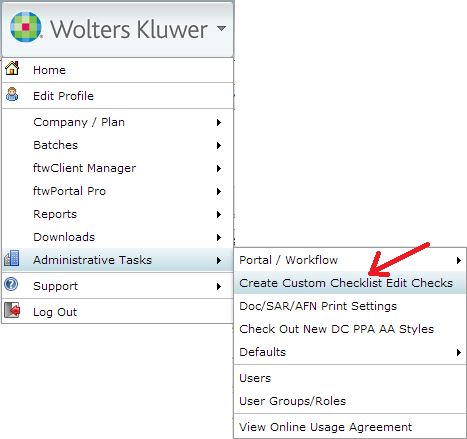
A drop down list of options will appear under the Wolters Kluwer logo, select Administrative Tasks from the list, then select Create Custom Checklist Edit Checks.
Custom Edit Check Dashboard
Clicking Create Custom Checklist Edit Checks will take you to the Custom Edit Check Dashboard. Here you can view all system and custom edit checks. To help you view only the edit checks applicable your current needs, we have added filtering and sorting options.
- Above the column header is a place to enter criteria to filter results. Filters will reduce the listing to only those edit checks meeting the specified criteria. To remove a filter, click the ‘x’ next to the filter applied.
- The columns can be sorted by clicking on the header of the column. Clicking once will sort in either alphabetical or numeric order, depending on the data. Clicking twice on a header will sort in the opposite order.
- To view all columns, you can maximize the grid by clicking the blue page icon in the upper-right corner of the grid.
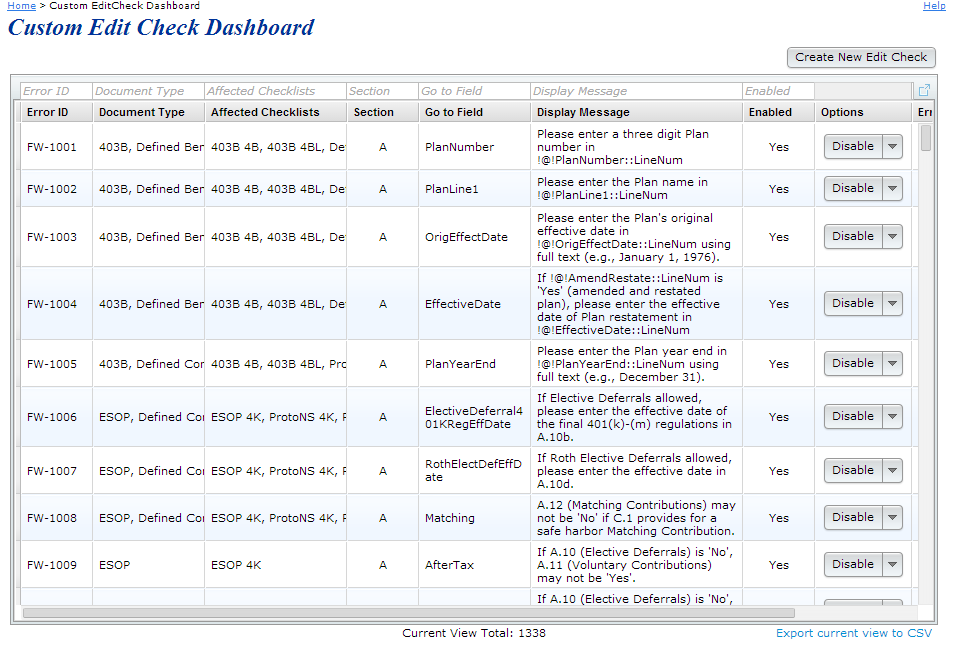
The edit check grid columns display:
- Error ID: This is a value used to identify the edit check. System generated Error IDs will be in the format of FW-####. Custom edit check Error IDs will be in the format defined by you. This can be any combination of numbers or alpha characters.
- Document Type: All document types that the edit check applies to will be listed here.
- Affected Checklists: All checklists that are affected by the edit check will be displayed in this column. Below are a list of possible checklists for each document type:
- 403(b)
- Section 403(b) Plan (Full Scope) – 403B 4B
- Section 403(b) Plan (Limited Scope) – 403B 4BL
- Defined Benefit
- Cash Balance Plan (Proto Format) - DefBen CB
- Cash Balance Plan (ID Format) - DefBen CBID
- Defined Benefit Pension Plan (Proto Format) – DefBen DB
- Defined Benefit Pension Plan (ID Format) – DefBen DBID
- Defined Contribution
- Prototype Non-Standardized 401(k) - ProtoNS 4K
- Prototype Non-Standardized Money Purchase - ProtoNS MP
- Prototype Non-Standardized Target Benefit - ProtoNS TG
- Prototype Standardized 401(k) - ProtoSTD 4K
- Prototype Standardized Money Purchase - ProtoSTD MP
- Volume Submitter: Volume Submitter 401(k) – VolSub 4K
- Volume Submitter Profit Sharing – VolSub PS
- Volume Submitter Money Purchase – VolSub MP
- Volume Submitter 401(k) (Prototype Format) – VolSub 4KPT
- ESOP
- Employee Stock Ownership Plan - ESOP PS
- Employee Stock Ownership Plan 401(k) - ESOP 4K
- MISC
- Misc (1099, 5500 or Admin Software) - Misc WL
- NonQualified
- Section 409A Plan - NonQual 409A
- Section 457(b) Plan - NonQual 457B
- TIAA
- Governmental 457(b) Plan - TIAA 457BGOVT
- Tax-Exempt 457(b) Plan - TIAA 457BTEND
- Welfare
- Cafeteria Plan - Welfare Cafe
- Health Reimbursement Arrangement - Welfare HRA
- Premium Only Plan - Welfare POP
- Trans Spend Acct - Welfare 132
- Wrap Plan - Welfare WRAP
- 403(b)
- Section: This column displays the section of the document that the edit check applies to.
- Go to Field: When the edit check is triggered, you will be directed to the field listed in this column.
- Display Message: This is the message that you will see when the edit check is triggered.
- Enabled: Will show "Yes" if the edit check is active or "No" if the edit check has been disabled.
- Options - Drop-down arrow will display options depending upon the edit check type:
- All edit checks: Disable/Enable button - Click the Disable/Enable button to Disable an active edit check or Enable a disabled edit check. Note that the button needs to be pressed, not the drop-down box, to enable or disable the edit check.
- Custom Edit checks: Delete - Pressing the drop-down arrow will give the option to edit or delete a custom edit check.
- Custom Edit checks: Edit – If Edit is selected, you will be directed to the Custom Edit Check Builder, where you have the option to change the edit check criteria or cancel to leave as is.
- Error Lvl
- Warnings will flag a field as yellow and will display the warning message but allow you to still continue through document submission process.
- An error will prevent you from completing the document due to the condition that is set.
- System: This column will display "Yes" if the edit check is a system (ftwilliam.com) edit check and "No" if the edit check is a custom edit check.
Export Current view to .csv – Pressing this link will download all edit checks. If filters were applied, only the edit checks with which the filters applied will be displayed in the spreadsheet.
Custom Edit Checks
Clicking the Create New Edit Check button will take you to the Custom Edit Check Builder screen to create a completely customized edit check.
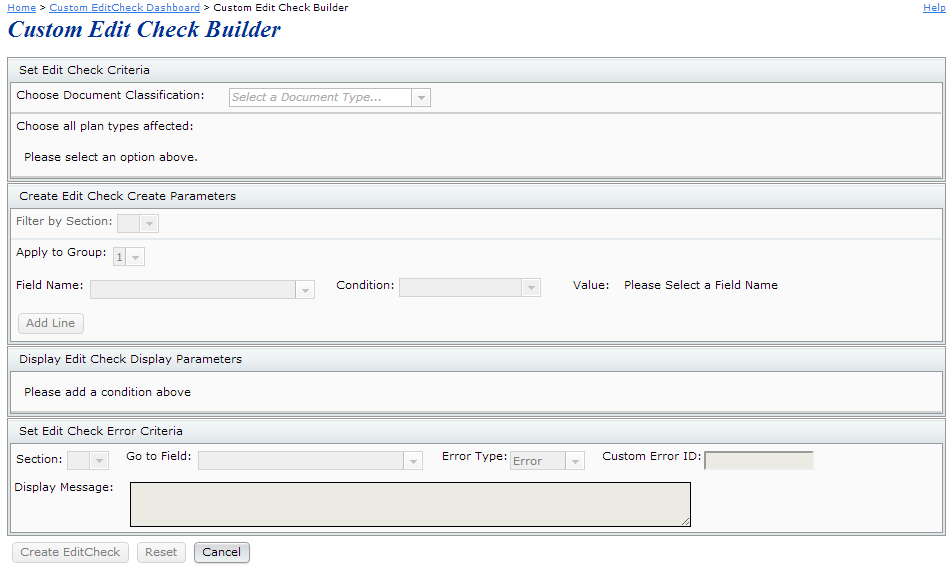
These are the steps you will take to create a custom edit check:
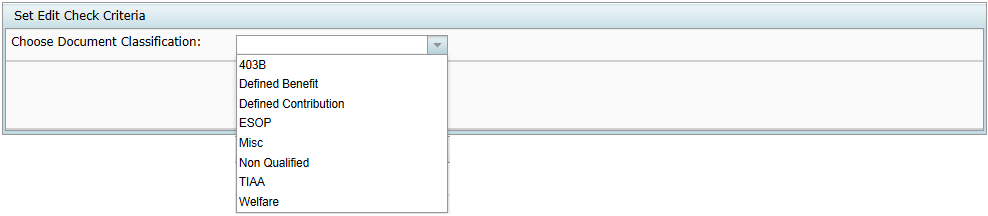
- Choose Document Classification – Use the drop down box to select a document type. Only one document type can be selected per custom edit check.
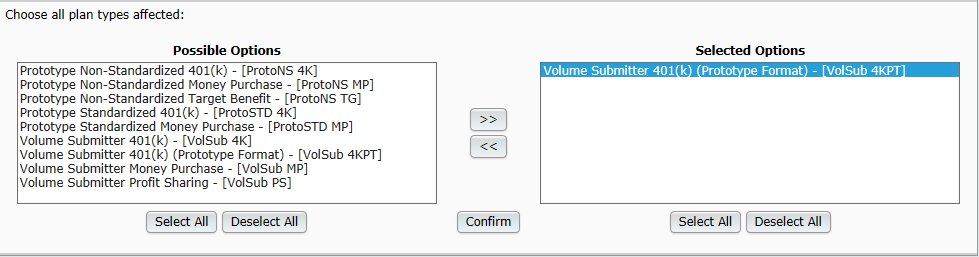
- Choose all plan types affected – Can select a single plan type or multiple plan types. Select multiple plan types by clicking on the plan type and pressing the ctrl button on your keyboard at the same time. If selecting all plan types, use the Select All button at under the possible options box. Click Confirm to move on to the next step.
- Create Edit Check Parameters – Here is where you will create the edit check.
-
- Filter by Section – Use this drop down box to select the section of the document that the edit check will apply to. This will reduce the fields you are able to select in Field Name to those in the selected section.
- Apply to Group - There are up to three different groups available. If a simple edit check is being created with only one field and one value, the group number will be irrelevant. The grouping will determine the "and/or" logic that is applied to the criteria of the edit check that involves multiple fields or values. This will be explained in greater detail below.
- Field Name – Use the drop-down box to select the name of the field that the edit check will look at (the available fields will be filtered depending upon the plan types selected - only fields that all types share will be available)
- Condition – Use the drop-down box to select the condition. Possible options include Less than, Equals, Not equal, Greater than, Less than, Greater or equal to, Less or equal to.
- Value – Depending on the field name selected, you will either select an option (or multiple options) from a specified list or enter the value manually.
- If selecting an option from a list
- You can select one option by clicking on the given value, then by pressing Add Line.
- You can select multiple options by simultaneously holding the ctrl button on the keyboard and selecting the multiple options in the list. Note that by selecting multiple options in a list in this manner, the multiple options will have "or" relationship logic.
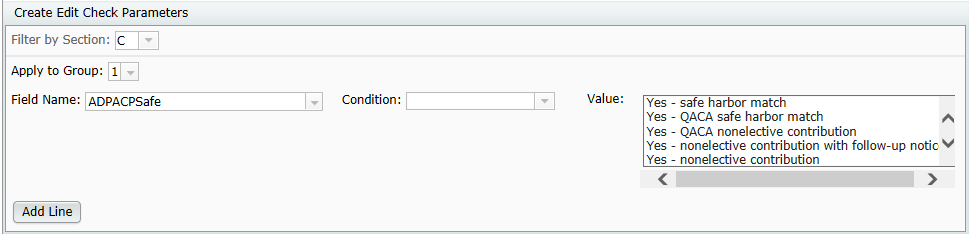
- Example: In the screenshot below, the Value is selected from a predetermined list. As such, no "ADD" button will be found, only the Add Line button.
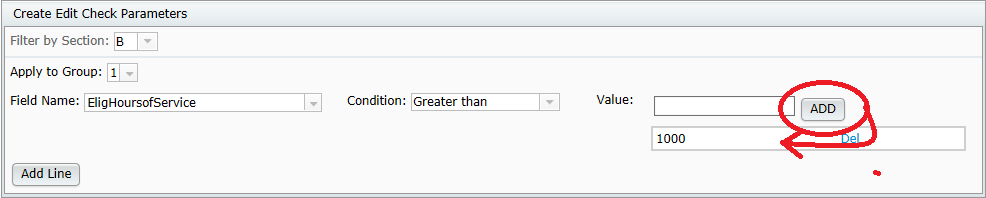
If entering a value manually - The value entered can be numeric, alpha character or special character.

- You must enter a value, then press the ADD button
- Pressing the ADD button displays the amount entered in a box below the "Value" field.
- Now you have the option to either enter another value to add to the edit check and press ADD again; or if done, you may press the Add Line button to add the edit check to the edit check parameters.
- Let’s assume you are done and presses Add Line. Now the edit check will appear in the Display Edit Check Parameters:

- If selecting an option from a list
- Press ADD – The ADD button will appear if the value in the value field was required to be manually entered.
You will see an ADD button to the right of the value box. This ADD button should be pressed prior to pressing the Add Line button.
To create an "And" relationship between values in a group, complete the field name, condition and value, press ADD, then press Add Line
It is possible to create an "or" relationship between values in a group, as long as the field name does not change. To create an "or" relationship between values in the same group, complete the field name, condition and value, then press ADD. Then enter new data in the Value box and press ADD again. Each value that is added will have an "or" relationship. Press Add Line when done.
- Press Add Line
- After adding all edit checks within a group, press Add Line.
- To add a blank "Value" for a field that requires manually entered data, press Add Line without pressing ADD first.

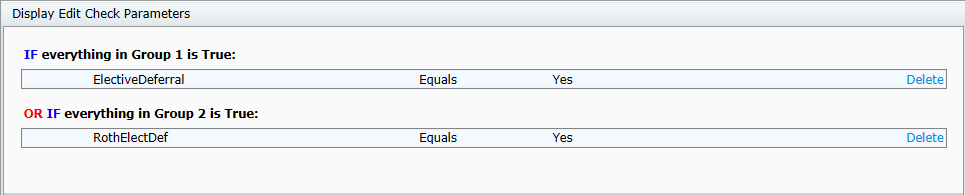
- Display Edit Check Parameters – After pressing Add Line the edit check criteria will be added to 'Display Edit Check Parameters'. If more than one line has been added, the lines will have either an "and" or an "or" relationship, based on the grouping and method of adding, as described above. Below is a review of the different logic options for the custom edit check.
- Parameters of different groups have "or" logic.
- Different Field Name criteria within the same group have "and" logic.

- Edit checks with the same Field Name may have "and" or "or" logic, depending on how the data is added. Example of "or" logic for same field name within same group: If you wanted to check a field for a ‘001’ or a ‘002’, you could set the first edit check to group 1, select the Field Name, set the Condition and enter a ‘001’ the Value field, then press ADD. Then you would enter a ‘002’ in the Value field and again press Add. Lastly, press Add line.
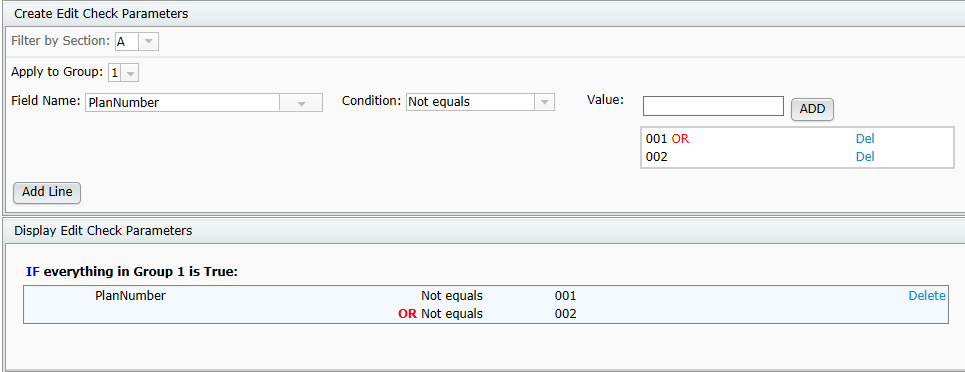
- Add a BLANK field (as shown below) by entering nothing in the "Value" field and pressing Add Line.

- Set Edit Check Error Criteria
- Section: Enter the section that the edit check applies to
- Go to Field: Enter the Field in which you should be directed to when the error or warning message is applicable.
- Error Type: Designate whether the edit check should be classified as a warning or an error.
- Warning – Fields that do not pass warning edit checks will be highlighted in yellow.
- Error - Fields that do not pass error edit checks will be highlighted in red.
- Custom Error ID: This field can be used to enter an identification number specific to the edit check. Users can use numbers, alpha characters or a combination of both. You can duplicate the same error ID or use a unique ID for every edit check.

- Press Update Edit Check to save the edit check and return to the Custom Edit Check Dashboard.